Habenero Ginger Apple Cider Cocktail
The folks at Lover.ly (my favorite go to wedding website if you didn't catch on from ALL of my wedding posts!) asked me to look for a Fall wedding signature drink idea I was ALL about it. Over the years my friends and I have made lots of great beverages. Of course trying to recreate them is another story since we usually didn't have all the ingredients the recipe called for.
Habanero Ginger Apple Cider Cocktail.
The drink that I choose combines a drink my friend Kate and I made around Thanksgiving along with my favorite drink (The Brazen Bull) at The Gallows in Boston. Kate and I made a great drink with apple cider, Sailor Jerry Rum, cinnamon simple syrup and a twist of lemon. Of course I couldn't find the recipe so I had to go to trusty Pinterest to find it again. I couldn't find what I was looking for but discovered this tasty treat. Basically it is similar to what Kate and I made but kicks it up a notch with fresh ginger and habanero peppers.

If this doesn't warm you up on a cool fall day then I don't know what will. I would also like to test this out with Bourbon or Vodka.
National Tequila Day Inspiration
Apparently I just learned that today is National Tequila Day! What better way to celebrate a Thirsty Thursday. Here are a few recipes I am eying on Pinterest! Do you like the tequila theme?
To start we need a cocktail!
 |
| Mesa Mule |
Appetizers...
 |
| Mini Tacos |
Then dinner obviously...
 |
| Slow Cooker Tequila Lime Chili |
 |
| Tequila Lime Coconut Macaroon Bars |
 |
| Tequila Sunrise Pink and Green Tube Top Dress |
Happy National Tequila Day! How are you celebrating?
Fresh Tortellini with Asparagus, Peas and Fresh Mint
Is my husband's new favorite pasta dish! My husband is a BIG meat and potato guy. Anytime I make any type of pasta or salad he always asks if we can add some type of protein in it... Well that all changed with this recipe from Fine Cooking that I found on Pinterest.
This is a one pot meal and so delicious and easy. Basically you boil the tortellini, peas and asparagus in one pot! And then in your serving bowl you add the olive oil, garlic, cayenne pepper, cheese, mint and toasted pine nuts in the other. Did I mention how yummy this meal is?
Ingredients:
- 1/3 cup extra virgin olive oil
- 2 medium garlic cloves pressed
- 1/8 tsp cayenne
- 1lb fresh cheese tortellini (I used Buitoni)
- 1lb asparagus trimmed and cut into 1/2 inch pieces
- 1 cup peas (I used de-thawed frozen but you could use fresh!)
- 1/3 cup pine nuts, toasted (I didn't use these because I forgot to buy them!!)
- 1/4 cup coarsely chopped fresh mint
- 2 oz fresh goat cheese, softened (I used pecorino romano cheese)
- Salt & Pepper
Directions:
- Cook tortellini according to directions. With 3 minutes left add asparagus and with one minute left add the peas. You want to make sure that you don't overcook the vegetables and make them mushy.
- In a large bowl, combine the olive oil, garlic, cayenne, and 1/2 tsp salt
- Reserve one cup of pasta cooking water, and drain pasta with vegetables and toss in large bowl with garlic/olive oil mixture.
- Add the pine nuts, mint, and cheese and stir until the cheese melts into the sauce. Add cooking water if needed to moisten the pasta. Season to taste!

The best part of this recipe is all the different ways you can change it based on the ingredients you have in your house! You can add some crispy procisutto, try penne instead of tortellini, maybe a flavored olive oil, and play around with different cheeses!
Would love to hear how you would make this dish differently!
Apologizing in advance for the bad photos! My camera lens broke so I am back to using my iPhone to take pictures!
Happy Pinning!
Portobello Mushroom Burgers with Spicy Avocado Sauce
So I don't know about you but I have been eating grilled chicken and burgers non-stop. The other day I was going to pick up some ground beef for burgers and just couldn't get myself to buy it. So I was wondered back over to the vegetable section to see if anything inspired me. And that is where I saw the portobello mushrooms. I quickly took out my phone and searched Pinterest for some recipes. And that is where I found a recipe by Martha Stewart for portobello mushroom burgers with a spicy avocado sauce. Oddly enough I had all the ingredients at home! SCORE!
Now the next trick was getting my husband to eat the portobello burgers! Haha! These are so simple to make. And I served them like traditional burgers with monteray jack cheese with jalapeños, fresh garden tomatoes, and cabbage slaw. Result was a SUCCESS and my husband loved the switch up. Secretly I think he really like the spicy avocado sauce and just tolerated the mushroom!
Ingredients:
- 4 large portobello mushrooms, stems removed
- 1 tablespoon olive oil
- Coarse salt and ground pepper
- 1 ripe avocado, pitted, peeled, roughly chopped
- 1 tablespoon spicy brown mustard
- 1 tablespoon horseradish
- 1 tablespoon fresh lime juice
- 1 jalapeño chile finiley chopped
- 4 soft rolls
- Sliced tomatos
- Sliced monteray jack cheese with jalapeños if desired
- Cabbage Slaw (see recipe below)
Preheat oven to 425 degrees. On a large rimmed baking sheet, toss mushrooms with pool and 2/3 cup water; season with salt and pepper. Arrange stem side down; cover loosely with foil. Roast until tender, 30 to 45 minutes.
When mushrooms are cooking, in a medium mixing bowl combine avocado, mustard, horseradish, lime juice, and jalapeño.
Toast rolls and layer each bottom half with tomato, portobellos and each top half with avocado mixture.

Cabbage Slaw Recipe - from Foodess.com. Just put into bowl and stir!
- 4 cups shredded cabbage (I used a bag of shredded coleslaw mix - I was being lazy!)
- 1/3 cup chopped cilantro
- 2 green onions, minced
- 1 clove garlic, minced
- 3 tbsp distilled white vinegar
- 1 tsp kosher salt
- 2 tsp white sugar
- 1/2 chopped jalapeño (This wasn't in the original recipe but I added!)
I also want to introduce you to the best/most potent horseradish we found in Charleston. Before our wedding we were at Pearlz Oyster Bar talking to the bartender about how we loved strong horseradish with our oysters. He then brought out Nasal Napalm. And let me tell you this stuff is STRONG! But so amazingly good and perfect for oysters, shrimp cocktail or my favorite Bloody Mary's. I believe the only place you can buy this is in Charleston at Pepper Palace. But you can also order online too! If you are in Charleston and go to Pepper Palace to sample the nasal napalm make sure to only taste the smallest amount. My brother-in-law took a whole spoonful and I don't think he fully recovered for a few hours!
 Happy Pinning!
- 4 large portobello mushrooms, stems removed
- 1 tablespoon olive oil
- Coarse salt and ground pepper
- 1 ripe avocado, pitted, peeled, roughly chopped
- 1 tablespoon spicy brown mustard
- 1 tablespoon horseradish
- 1 tablespoon fresh lime juice
- 1 jalapeño chile finiley chopped
- 4 soft rolls
- Sliced tomatos
- Sliced monteray jack cheese with jalapeños if desired
- Cabbage Slaw (see recipe below)
Preheat oven to 425 degrees. On a large rimmed baking sheet, toss mushrooms with pool and 2/3 cup water; season with salt and pepper. Arrange stem side down; cover loosely with foil. Roast until tender, 30 to 45 minutes.
- 4 cups shredded cabbage (I used a bag of shredded coleslaw mix - I was being lazy!)
- 1/3 cup chopped cilantro
- 2 green onions, minced
- 1 clove garlic, minced
- 3 tbsp distilled white vinegar
- 1 tsp kosher salt
- 2 tsp white sugar
- 1/2 chopped jalapeño (This wasn't in the original recipe but I added!)
I also want to introduce you to the best/most potent horseradish we found in Charleston. Before our wedding we were at Pearlz Oyster Bar talking to the bartender about how we loved strong horseradish with our oysters. He then brought out Nasal Napalm. And let me tell you this stuff is STRONG! But so amazingly good and perfect for oysters, shrimp cocktail or my favorite Bloody Mary's. I believe the only place you can buy this is in Charleston at Pepper Palace. But you can also order online too! If you are in Charleston and go to Pepper Palace to sample the nasal napalm make sure to only taste the smallest amount. My brother-in-law took a whole spoonful and I don't think he fully recovered for a few hours!
Strawberry-Mint Sparkling Limeade
So I had all these ambitions to use strawberries over the 4th of July holiday, none of which ended up happening. So that meant that I had 2 pints of strawberries that I needed to use. I also had a bunch of limes that I bought as well, and we have to use all those limes since they are so pricey! Which made me search recipes on Pinterest for Strawberries and Lime.
And Pinterest came to the rescue!! Woo hoo! I found a great and easy recipe for strawberry-mint sparkling limeade from Cooking Lite May 2012. Not to mention this recipe can be kid friendly too! Just swap the alcohol for club soda!
Ingredients:
- 2 pints of strawberries
- 1/2 cup loosely packed fresh mint leaves
- 1/2 cup fresh lime juice (about 6 limes)
- 1/4 cup water
- 1/4 cup agave nectar
- 1 bottle chilled sparkling wine
- Whole strawberries, lime slices, etc for garnish
Directions:
- Blend strawberries, mint, lime juice, water and agave in a blender. Add crushed ice for a extra frosty beverage.
- Pour mixture into glasses about half way
- Top with sparkling wine or club soda
- Stir, garnish and SIP
This is such a good recipe. Since I had so many strawberries I was able to make extra which I keep in a mason jar in my fridge. Then when I want a drink I just add the bubbles!
 Happy Pinning!
Taco Tuesday
One of our favorite date nights was on Tuesdays in Boston was Taco Tuesday at this lil dive bar in Fanueil Hall. This restaurant was located in the basement and for some reason we just loved it. Not to mention the tacos were only $1 which left extra money for margaritas!!
So since it is Tuesday it only seems appropriate to share my Taco Tuesday meal I made last Tuesday!! This is a combination of recipes since I couldn't decide on one specific way to make them.
I wanted to make a combination of both fish (cod) and chicken tacos. The leftover chicken tacos I made into a salad. For the fish we used cod, but you could also use mahimahi or any other white flakey fish that you choose.
To cook the fish we used our salt block again! We coated the fish with olive oil so it wouldn't stick to the salt block. And the chicken we just grilled and I put taco seasoning on it. Super simple!

Now lets talk about toppings for the tacos! In addition to the normal lettuce, salsa, tomato, and cheese we served the following toppings for the tacos...
Guacamole: My own recipe! Just put into bowl and mash!
- 2 avocados
- 1 tsp cumin
- 1 tablespoon garlic
- 1/4 teaspoon salt
- 1 chopped jalapeño
- 1 seeded/chopped tomato
- 1 lime juiced - and zested
Lime Crema: From Foodess.com. Just put into bowl and stir!
- 1/3 cup sour cream
- 3 tablespoons of mayonnaise
- juice and zest of 1 lime
- salt
Mango Avocado: Recipe adapted from organicgardening.com
- 1 mango, pitted, peeled and cubed
- 1 avocado, pitted, peeled and cubed
- 1/2 red onion, finely chopped
- Juice of 1 lime, plus wedges
- Chopped cilantro to garnish
- salt and black pepper to taste
Cabbage Slaw: From Foodess.com. Just put into bowl and stir!
- 4 cups shredded cabbage (I used a bag of shredded coleslaw mix - I was being lazy!)
- 1/3 cup chopped cilantro
- 2 green onions, minced
- 1 clove garlic, minced
- 3 tbsp distilled white vinegar
- 1 tsp kosher salt
- 2 tsp white sugar
- 1/2 chopped jalapeño (This wasn't in the original recipe but I added!)

Results were DELISH and for the toppings you just put everything in their respective bowls, then toss/mash/stir accordingly! The best part is since many of the ingredients for the toppings were the same, so I cut up all the vegetables/fruits at one time and divided everything into thirds. This made it super simple and quick to make all 4 toppings. Not to mention all the leftovers make great salads for lunch!
To serve I put everything on a tray and we all enjoyed! Also, not pictured is the black bean quinoa salad which I posted the other day. Shhh don't tell my guests I served them leftover salad!!
Happy Pinning!
By Jennifer Shelton
Rice Noodle Salad with Peanuts and Cucumber
So I randomly started following Jessica Seinfeld (yes, Jerry's wife) on Instagram. She is super funny and love her pictures. One day she posted a picture from her Do It Delicious website and I discovered one of my new favorite go to websites for pinning recipes. Her recipes are all super simple, semi-healthy and most of all quick & easy for dinners.
The first recipe I tried was the rice noodle salad with peanuts and cucumber. This recipe is super simple and I added some grilled chicken to make it a dinner meal. This is a great salad if you are having people over for lunch as well, especially if you want to serve something refreshing in the summer.
Ingredients:
- 8 ounces this rice noodles
- 1/3 cup fresh lime juice (about 3-4 limes)
- 1 tablespoon toasted sesame oil
- 2 teaspoons chili-garlic paste
- 2 teaspoons light brown sugar
- 1/4 teaspoon kosher salt
- 1 small head of romaine lettuce or you can try shredded cabbage
- 2 carrots grated
- 1 kirby cucumber sliced into thin moons (I used an english cucumber)
- 1/2 cup mixed basil and mint
- 1/2 cup salted peanuts
- Sliced grilled chicken if you want!
 Directions:
- Place the noodles in a large bowl and cover with hot water. I boiled my water in the teapot and then just poured over the noodles. Let the noodles soak until tender, about 5 minutes. Drain in a colander when done.
- Meanwhile, make the dressing. I just put all the ingredients into a small mason jar and combined the lime juice, sesame oil, chile-garlic paste, sugar and salt. Set aside
- Cut the lettuce into thin strips. Place the drained noodles on a large serving platter and scatter the romaine over the top.
- Grate the carrots on a box grater. Scatter over the romaine. Add cucumbers.
- Chop the herbs and peanuts and sprinkle over salad and drizzle with dressing!
 And how simple was that? This recipe takes about 10 minutes to make and is so delicious and refreshing on a hot day. My husband added a little more chili-garlic paste to his meal because he loves everything super spicy.
Happy Pinning!
- Place the noodles in a large bowl and cover with hot water. I boiled my water in the teapot and then just poured over the noodles. Let the noodles soak until tender, about 5 minutes. Drain in a colander when done.
- Meanwhile, make the dressing. I just put all the ingredients into a small mason jar and combined the lime juice, sesame oil, chile-garlic paste, sugar and salt. Set aside
- Cut the lettuce into thin strips. Place the drained noodles on a large serving platter and scatter the romaine over the top.
- Grate the carrots on a box grater. Scatter over the romaine. Add cucumbers.
- Chop the herbs and peanuts and sprinkle over salad and drizzle with dressing!
And how simple was that? This recipe takes about 10 minutes to make and is so delicious and refreshing on a hot day. My husband added a little more chili-garlic paste to his meal because he loves everything super spicy.
Poppy Seed Popovers
Remember when I said that every recipe on Pinterest isn't always a win? Well this recipe took my two attempts before I was 100% happy! There was a recipe on Super Golden Bakes for poppy seed popovers that looked delicious. I make popovers every so often so I thought it was odd that you didn't use a blender or food processor to stir.Since this was a new recipe I wanted to make sure I followed it exactly. However, my lil popovers came out all puffy and pretty, but then flopped when cooling. I tasted them and they were sort of blah, so back to Pinterest! Where I found a recipe from Food & Wine Orange popovers. I didn't have any oranges in the house so I swapped the oranges for lemon! Lemon poppy popovers sounded relish! I also had some Trader Joe's lemon curd in my fridge that would go perfect with them.
So I adapted the Food & Wine Orange popover recipe and changed it to Lemon Poppy Popovers! Plus how fun is the name?
Ingredients:
- 3 large eggs, at room temperature
- 1 tablespoon sugar
- 1 teaspoon finely grated lemon zest
- 1 1/4 cups milk
- 4 tablespoons unsalted butter, melted
- 1 tsp vanilla
- 1 1/4 all-purpose flour
- 1/2 teaspoon baking powder
- 1/2 teaspoon salt
Directions:
- Preheat the oven to 425 degrees.
- Brush the popover pan or muffin tin with butter and coat all sides well. Heat the pan in the oven for 5 minutes, butter should be a nutty brown.
- In a blender, mix the eggs with the sugar and lemon zest. Add the milk and 3 tablespoons of the melted butter and vanilla and mix for a few seconds. Add the dry ingredients and blend until smooth (about 30 seconds).
- Carefully fill the pan with the popover pan halfway with the batter.
- Bake the popovers for about 30 minutes, until they are risen and browned. Turn the popovers onto a serving platter and serve warm with preserves or lemon curd.

Black Bean Quinoa Bowl with Cilantro Lime Vinaigrette
So I decided to take a different take on my salad recipe this week and decided upon a black bean quinoa bowl that I saw on Pinterest. Not to mention my husband is tired of my "bunny" food and thinks I am trying to starve him with all the lettuce, kale and arugula. Haha!
This salad is all over Pinterest so I decided to make it. The recipe originated on the Veggie and the Beast Feast. The recipe on the website is vegan and gluten free but I adapted it slightly. I noted below where I switched ingredients, or added additional ingredients.
Black Bean Quinoa Bowl Salad Ingredients:
- 2 teaspoons of canola oil
- 1/4 diced onion
- 1 cup quinoa
- 1/4 teaspoon salt
- 1 (15 ounce) can black beans, rinsed and drained
- 1/4 red onion - cut into thin slices (I just diced)
- 1/2 red pepper - cut into this slices (I just diced)
- 1/2 yellow pepper - cut into this slices (I just diced)
- Cilantro, for garnish
- Optional Toppings: Sliced avocado, grilled chicken, mango, crushed tortilla chips, monterey jack cheese with jalapeños
Cilantro Lime Vinaigrette Ingredients:
- 1/2 cup cilantro
- 2 tablespoons plus 1 teaspoon of honey (I used agave)
- 1 teaspoon apple cider vinegar
- 1 lime, juiced and zested
- 2 tablespoons canola oil
- 1/ teaspoon salt
Directions:
- Heat 2 tsp of canola oil in saucepan over medium heat. Add the chopped red onion and cook until starting to soften (2-3 minutes). Pour in the dry quinoa and toast, stirring frequently for 3-5 minutes. Add 2 cups water and salt, bring to a boil and cover, reduce heat to low and simmer for 15-20 minutes, until the water is absorbed. Set aside.
- Toss together the cooked quinoa with the black beans, red onion, peppers in a bowl.
- To make the vinaigrette, combine all ingredients in a blender and blend until completely smooth.
- Pour the vinaigrette over the quinoa and toss well. Add additional toppings such as grilled chicken, avocado, cheese!

I forgot to mention that I added grilled chicken that had a mexican rub on them. Just to give the salad more flavor. I served the meal and forgot to take a picture of the finished product! My apologies!!
This salad made a lot so I was able to re-use the salad and served it with tacos (see tomorrow's post) the next day. The only thing I did notice about the salad is that it dried out. So to make it fresh I added another juiced lime and it perked the salad right up.
What else would you add to this salad?
Happy Pinning!
By Jennifer Shelton
- 1/2 cup cilantro
- 2 tablespoons plus 1 teaspoon of honey (I used agave)
- 1 teaspoon apple cider vinegar
- 1 lime, juiced and zested
- 2 tablespoons canola oil
- 1/ teaspoon salt
Directions:
- Heat 2 tsp of canola oil in saucepan over medium heat. Add the chopped red onion and cook until starting to soften (2-3 minutes). Pour in the dry quinoa and toast, stirring frequently for 3-5 minutes. Add 2 cups water and salt, bring to a boil and cover, reduce heat to low and simmer for 15-20 minutes, until the water is absorbed. Set aside.
- Toss together the cooked quinoa with the black beans, red onion, peppers in a bowl.
- To make the vinaigrette, combine all ingredients in a blender and blend until completely smooth.
- Pour the vinaigrette over the quinoa and toss well. Add additional toppings such as grilled chicken, avocado, cheese!
I forgot to mention that I added grilled chicken that had a mexican rub on them. Just to give the salad more flavor. I served the meal and forgot to take a picture of the finished product! My apologies!!
Summer BBQ Recipes
This past weekend we had friends over for a lake day! Hanging out in the lake, boat rides and then a bbq. So I knew I had to make things in advance, or come together easily. I have to say the homemade BBQ sauce was soooooooo good! Here is a sample of the menu I made for us! These recipes are also perfect if you are attending a BBQ and want to bring something or you can even use the pickles or bbq sauce as a hostess gift. I apologize in advance for my pictures! I just took a few quick snaps with my iPhone!
one... Homemade BBQ Sauce
I found the recipe on epicurious.com and it is amazing. Most sauces are too sweet for my husband, so I was looking for something that had a little more kick. Did I mention how easy it was to make the homemade bbq sauce too? Basically you just put everything in a pot and let it simmer! Click here for the recipe, for a spice rub I used Penzey Spices Galena Street Rub. If you haven't checked out Penzey Spices definitely recommend. Perfect for grilling! Remember when you are grilling the chicken add the BBQ sauce later on in the process, otherwise it will scorch and look black!
two... Homemade Pickles
This recipe was originally found by our Miss Kate via The Dabble! She made this years ago for a party and since then all of us girls have been making it for every picnic and party. Homemade pickles are SO easy and not to mention it is fun to experiment with different kinds of veggies. Over the years we have used everything from traditional cucumbers, to white asparagus and green beans. The one thing we do change in this recipe is using ground coriander seeds and black pepper. Reason being then you don't have to pick the seeds off your veggies as you eat.
 three... Penne with Green Beans & Tomatoes with a Lemon-Shallot Vinaigrette
I was sitting in my mother-in-law's living room flipping through the July issue of Southern Living and saw a recipe for a lemon-shallot vinaigrette that looked delicious! And they used it with a penne with green bean and tomato salad. Don't get me wrong the pasta salad was delicious but the vinaigrette was SOOOOOO good! I am definitely adding this one of my go to salad dressing recipes. It would be great on a kale or arugula salad. I love the citrus kick along with the dijon mustard. I adapted the salad slightly and also added some red and orange peppers since I had them in my refrigerator and needed to use them!

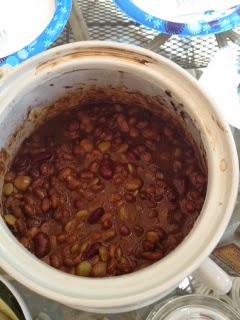
four... Oven Baked Beans
When I first registered for the Le Creuset Heritage Bean Pot my husband thought I was insane and that I would never ever use it. I told him that I would use it all summer long. Then we actually received it and I couldn't wait to start using it. Le Creuset provided a bunch of recipes on ways to use it, and for our BBQ I decided to make the oven baked bean recipe. Let me tell you how floored my husband was when I put the pot on the table! Haha! The recipe is super easy and basically you just dump all the ingredients into the pot, give it a stir and bake covered for 1 hour. Voila you not only have oven baked beans but it is quite the serving dish to impress your guests with too! I couldn't find the recipe online so please see ingredients below!
five... Marinated Zucchini Salad
This recipe was found on Pinterest! Again, this is super simple to make. The recipe calls for 4 zucchini thinly sliced. However, I think they are referencing 4 extremely small zucchini! I think two zucchinis are more than enough, and I would double the recipe for the dressing. I followed the recipe exactly and then had to go back and make another batch of dressing since only a small portion of the zucchini was covered. What is great about this recipe is that you can make this ahead of time and the dressing needs to marinate on the zucchini for over an hour. So great if you have to travel someplace, or to prepare ahead.
 And appetizers were kept super simple with salsa and chips, homemade guacamole, and veggies with dip. All of which were prepped/prepared beforehand so we could enjoy every minute of sunshine on the lake! Dessert was fresh watermelon!
 Would love to hear what you are making for summer barbecues! I am always looking for new recipes to try out!
one... Homemade BBQ Sauce
I found the recipe on epicurious.com and it is amazing. Most sauces are too sweet for my husband, so I was looking for something that had a little more kick. Did I mention how easy it was to make the homemade bbq sauce too? Basically you just put everything in a pot and let it simmer! Click here for the recipe, for a spice rub I used Penzey Spices Galena Street Rub. If you haven't checked out Penzey Spices definitely recommend. Perfect for grilling! Remember when you are grilling the chicken add the BBQ sauce later on in the process, otherwise it will scorch and look black!
two... Homemade Pickles
This recipe was originally found by our Miss Kate via The Dabble! She made this years ago for a party and since then all of us girls have been making it for every picnic and party. Homemade pickles are SO easy and not to mention it is fun to experiment with different kinds of veggies. Over the years we have used everything from traditional cucumbers, to white asparagus and green beans. The one thing we do change in this recipe is using ground coriander seeds and black pepper. Reason being then you don't have to pick the seeds off your veggies as you eat.
I was sitting in my mother-in-law's living room flipping through the July issue of Southern Living and saw a recipe for a lemon-shallot vinaigrette that looked delicious! And they used it with a penne with green bean and tomato salad. Don't get me wrong the pasta salad was delicious but the vinaigrette was SOOOOOO good! I am definitely adding this one of my go to salad dressing recipes. It would be great on a kale or arugula salad. I love the citrus kick along with the dijon mustard. I adapted the salad slightly and also added some red and orange peppers since I had them in my refrigerator and needed to use them!
four... Oven Baked Beans
When I first registered for the Le Creuset Heritage Bean Pot my husband thought I was insane and that I would never ever use it. I told him that I would use it all summer long. Then we actually received it and I couldn't wait to start using it. Le Creuset provided a bunch of recipes on ways to use it, and for our BBQ I decided to make the oven baked bean recipe. Let me tell you how floored my husband was when I put the pot on the table! Haha! The recipe is super easy and basically you just dump all the ingredients into the pot, give it a stir and bake covered for 1 hour. Voila you not only have oven baked beans but it is quite the serving dish to impress your guests with too! I couldn't find the recipe online so please see ingredients below!
- 15 oz Kidney Beans, 15 oz can Pinto Beans, 15oz can Great Northern Beans, 28 oz can Pork n Beans, 15 oz can lima beans (I used frozen), 1/2 cup onion chopped, 1T chile powder (I used cayenne pepper for a EXTRA kick), 1/4 cup Worcestershire sauce, 1 cup brown sugar packed, 1/2 cup molasses, 1/4 cup mustard, and 1/2 cup hot BBQ sauce (I used the recipe above!)
five... Marinated Zucchini Salad
This recipe was found on Pinterest! Again, this is super simple to make. The recipe calls for 4 zucchini thinly sliced. However, I think they are referencing 4 extremely small zucchini! I think two zucchinis are more than enough, and I would double the recipe for the dressing. I followed the recipe exactly and then had to go back and make another batch of dressing since only a small portion of the zucchini was covered. What is great about this recipe is that you can make this ahead of time and the dressing needs to marinate on the zucchini for over an hour. So great if you have to travel someplace, or to prepare ahead.
Mango, Pineapple, Banana & Coconut Water Smoothie
Today, we had to bid adieu to my smoothie maker. I bought it at Kohl's for $20 and I should have just splurged on the higher priced model (my blender is in storage!). It never worked 100% but I was determined to use it because it was such a "deal". I could never get it to work with frozen fruit or ice, and really it's only purpose was for smoothies that used fresh fruit. Regardless, I still used the lil guy!! This morning I went to plug it in and immediately it started to smoke. Grr!!
So instead out came the hand blender and a mason jar to make this drink! Which by the way not sure why I never thought of this before! SO much easier!
Ingredients

So instead out came the hand blender and a mason jar to make this drink! Which by the way not sure why I never thought of this before! SO much easier!
Ingredients
- 5-6 cubes of frozen mango
- 5-6 cubes of frozen pineapple
- 1 banana cut in chunks
- 1 cup coconut water or coconut milk
- 1 tablespoon of shredded coconut
Just blend the first 4 ingredients and top with shredded coconut!
And voila! You can also add some flax seed if you want to make it a little healthier. I would also try to use coconut milk next time to make it creamer, but I didn't have any in the house! And it is way too early to go to the store!
Happy Pinning!
By Jennifer Shelton
Salt Block Cooking
Last fall my husband and I stumbled upon The Spice and Tea Exchange in Charleston. We walked in and my husband saw these pink salt blocks and instantly started asking the salesperson a gazillion questions on what they were, how to use them, what to cook on them, etc. If you are going to be using your salt block on the grill you want to make sure that you buy a higher quality one that is thick. The thinner salt blocks are used for serving and won't withstand the heat of the grill over a long period of time. By the way these are super heavy so make sure if you purchase one it is your last stop on your shopping trip!
 Needless to say we came home with one and it say in the closet for almost a year before we tried it out. Even though it did sit in the closet for almost a year, we did manage to buy a cookbook on Amazon to learn more about salt block cooking.
 If you are going to invest in a salt block I definitely suggest the cookbook. Not so much for the recipes but more for the science and technique behind it! It was extremely helpful for us to reference while we were testing out the salt block.
A few key things to remember about cooking on a salt block that we learned from the book!
- PATIENCE IS KEY
- Heat cookware grade salt blocks only
- Slowly warm up the salt block
- Do not touch the salt block when heating and use proper hand protections
- Do not soak the salt block in water to clean
- Damp sponge and scrubbing will clean the block
So, the first thing to know about salt block cooking is patience. You have to gradually warm up the salt block in 15 minute increments. Starting with low flames and gradually increase.
 Also, when you are reading directions it says to heat to 300-500 degrees, the thing to remember this isn't the temperature inside the grill it is the actual salt block. Our book had a great tip to see if your salt block is hot enough and ready for food. Just in case you didn't have a infrared thermometer laying around!
- Place your hand about 1.5 inches away from the salt block. If you can barely hold your hand there for 2 seconds then it is hot enough!!!
To prep the food make sure to spray your food with olive oil or the oil of your choice. For our first test we did Tuna Kebobs. Looking back we should have just done tuna steak since this was our first time experimenting with the block! The Tuna kebobs came out fine but we had to rotate on all four sides!
 When the grill is hot enough and you can't hold your hand near the salt block you can place your meat on the salt block. Cooking times will vary based on what you are cooking. Depending on what you are cooking you might actually turn off the flames, or turn them down lower so not to overcook your food. This is another reason the cookbook can come in handy for direction on how long to cook your meats/fish!
Our meal came out excellent and we can't wait to try other recipes!!
Other then that cooking on the salt block is super easy and no different then your grill. After we were done cooking we left the salt block on the grill overnight to cool. Remember this was heated to over 500 degrees so you want to make sure it is fully cooled before handling.
To clean you can run under water and wipe with a paper towel. However, I am not going to lie that you really need to put some elbow grease into cleaning.
 Next time I am going to make sure I spray our food better so it doesn't adhere to the block. I am also going to attempt the first wipe/clean when it is cooling on the grill.
Other salt block items you can buy our bowls (great for ceviche) and shot glasses (high quality tequila)!
I will definitely work on more recipes using the salt block but just wanted to share what I have learned!
Happy Pinning!
By Jennifer Shelton
- Place your hand about 1.5 inches away from the salt block. If you can barely hold your hand there for 2 seconds then it is hot enough!!!
To prep the food make sure to spray your food with olive oil or the oil of your choice. For our first test we did Tuna Kebobs. Looking back we should have just done tuna steak since this was our first time experimenting with the block! The Tuna kebobs came out fine but we had to rotate on all four sides!
Strawberry, Avocado, and Kale Salad with Lemon Poppy Seed Dressing
Okay, I decided to limit myself to one salad recipe a week for the blog. There are just so many great recipes out there I can't help myself. Not to mention they are super simple and don't require hours in the kitchen. Today's recipe was inspired by Two Peas and Their Pod kale, strawberry & avocado salad with lemon poppy seed dressing recipe.
This salad is super simple and great for lunch as well! I had to stop myself from eating the entire bowl.
Salad Ingredients:
- 4 cups chopped kale
- Pinch of sea salt
- 1 cup sliced strawberries
- 1 avocado, chopped
- 1/3 cup sliced almonds
- 1/4 cup feta cheese
Lemon Poppy Seed Dressing Ingredients:
- 2 tablespoons olive oil
- 2 tablespoons fresh lemon juice
- 1 teaspoon honey (I used agave)
- 1/2 teaspoon poppy seeds
- 1/8 tsp salt
- freshly ground pepper
Directions:
- Put the kale in a large bowl and massage with a pinch of sea salt to soften. Massage until the leaves are darker and tender.
- Add the salad ingredients and toss lightly.
- In a small jar (I used a mason jar) add salad dressing ingredients and shake!
- Pour the dressing over the salad and toss to coat!
 You can also add grilled chicken or shrimp to this salad as well! I just didn't have any chicken prepared!
Happy Pinning!
By Jennifer Shelton
- 4 cups chopped kale
- Pinch of sea salt
- 1 cup sliced strawberries
- 1 avocado, chopped
- 1/3 cup sliced almonds
- 1/4 cup feta cheese
Lemon Poppy Seed Dressing Ingredients:
- 2 tablespoons olive oil
- 2 tablespoons fresh lemon juice
- 1 teaspoon honey (I used agave)
- 1/2 teaspoon poppy seeds
- 1/8 tsp salt
- freshly ground pepper
Directions:
- Put the kale in a large bowl and massage with a pinch of sea salt to soften. Massage until the leaves are darker and tender.
- Add the salad ingredients and toss lightly.
- In a small jar (I used a mason jar) add salad dressing ingredients and shake!
- Pour the dressing over the salad and toss to coat!
You can also add grilled chicken or shrimp to this salad as well! I just didn't have any chicken prepared!
Happy Pinning!
By Jennifer Shelton
By Jennifer Shelton
Grilled Chicken with Strawberries, Kiwis and Honey Sesame Salad
You can tell it is summer by the amount of salads I have been making for dinner. Obviously eating salads for the sole purpose of eating Ben & Jerry's after dinner. Or on a good night being able to go to the ice cream shop and get a Reese Pieces sundae!! I saw this recipe on the Food Network (not on Pinterest I know I know) for Chicken Spinach Salad with Strawberries, Kiwi and Cashews in Honey Sesame Dressing. I wasn't 100% sure about using chicken broth as a salad dressing. So I adapted the recipe slightly.
Since I had to cook the chicken anyway, I figured I would use the dressing they have listed as a marinade for my chicken (marinade recipe below).
Salad Ingredients:
Arrange the spinach on salad plates or a bowl. Top with chicken, strawberries, kiwi slices and cashews. Drizzle dressing on top of salad.
Chicken Marinade Ingredients:

A few things to note!
If you can't find toasted sesame oil at your local store, try Homegoods or TJ Maxx. Every so often I can go in there and pickup flavored oils or spices that my local grocery store doesn't carry.
And my new favorite find (courtesy of my mother-in-law) are these small chicken broth containers. They are perfect for cooking. I always feel like I waste so much chicken broth when recipes only call for 1 cup or 1/2 cup. I bought these at Fresh Market but I am sure you can find them anywhere.
 By Jennifer Shelton
Since I had to cook the chicken anyway, I figured I would use the dressing they have listed as a marinade for my chicken (marinade recipe below).
Salad Ingredients:
- 6 cups baby spinach
- 1lb cubed cooked chicken (see chicken marinade recipe below)
- 1 cup hulled and sliced fresh strawberries
- 2 kiwis, peeled and cut crosswise into 1/4 inch think slices
- 1/2 cup salted dry-roasted cashews
Salad Dressing Ingredients:
- 1/4 cup olive oil
- 2 tablespoons honey
- 2 tablespoons toasted sesame oil
- 2 teaspoons honey mustard
- Salt and freshly ground pepper to taste
- 1/2 cup reduced-sodium chicken broth
- 2 tablespoons honey
- 2 tablespoons toasted sesame oil
- 2 teaspoons honey mustard
- Salt and freshly ground pepper to taste
I mixed all the ingredients in a shaker and then poured over chicken in a freezer bag. I let the chicken marinate for about an hour before taking it out to grill.
If you can't find toasted sesame oil at your local store, try Homegoods or TJ Maxx. Every so often I can go in there and pickup flavored oils or spices that my local grocery store doesn't carry.
And my new favorite find (courtesy of my mother-in-law) are these small chicken broth containers. They are perfect for cooking. I always feel like I waste so much chicken broth when recipes only call for 1 cup or 1/2 cup. I bought these at Fresh Market but I am sure you can find them anywhere.
Pasta with Spring Veggies and Soft Cooked Egg
Miss Kate is back at it again! This recipe is making me drool (was that too much information)? When we lived in Boston we used to go to a restaurant called Stella and this recipe reminds me of their linguine with poached eggs and truffle oil.
This is a great spring dish. Its easy enough for a weeknight meal, but seems fancy enough for a date night at home. It uses some fresh spring veggies tossed with pasta and topped with a soft cooked egg, the yolk runs into the pasta and makes it that much better!
Ingredients:
- 4oz Spaghetti
- 1 C Asparagus
- 1 C Snow Peas or Sugar Snap Peas
- 1 Small Zucchini
- 2TB Butter
- 1/2 C Parmesan Shredded
- 2 Eggs
Serves 2
Before I begin, I want to say I'm a big fan of mise en place, use it! It makes cooking much easier, a few minutes of prep work will save you headaches in the middle of the cooking process. My mise en place for this recipe...

Fill a large pasta pot with water, salt generously and bring to a boil. Also fill a small sauce pan or pot (just large enough to cook two eggs) with water and bring to boil.
While waiting for the water to boil, prep your veggies. Trim asparagus and cut into 2 inch pieces, trim the peas if necessary. Using a julienne peeler cut the zucchini into slices by going length-wise around the outer edge of the zucchini until you reach the seeds in the middle, discard that part.
Once the pasta water is boiling add pasta and cook for 1 minute less than the package instructions for al dente, then add the asparagus and peas and cook for the last minute, reserve about a cup of pasta water then drain the pasta and veggies.
In the smaller pot, reduce the water to a simmer and gently lower in the two eggs. Set a timer for 6 minutes and cook the egg for exactly 6 minutes. When done run under cold water immediately and set aside.
In a large skillet melt the butter and add about 1/4 C of the pasta water, then add the pasta and veggie mixture, along with the zucchini and Parmesan, stir to create a sauce adding more pasta liquid if necessary. Season with salt & pepper.
Turn off the heat but leave the pasta in the pan to stay warm and gently peel the soft cooked eggs, then divide the pasta among two bowls, top each with an egg, leaving it whole. Sprinkle lightly with Parmesan cheese, salt and pepper.

Then serve, each person can break into the egg and mix the yolk into the pasta, yum!
 Okay, I am off to Harris Teeter right now to go and buy these ingredients! I have some truffle salt that I have been dying to try and think I might sprinkle a little on top of this meal!
Happy Pinning!
Okay, I am off to Harris Teeter right now to go and buy these ingredients! I have some truffle salt that I have been dying to try and think I might sprinkle a little on top of this meal!
Happy Pinning!
By Kate Lindsey


By Kate Lindsey
Trader Joe's Cold Brew Coffee Concentrate
Today's Thirsty Thursday post is by Kate! She found the most amazing new product that I am OBSESSED with!
I don't know how long this product has been available, I just started going back to Trader Joe's. I love it there, and love that I have the time to get there! But anyway, I saw this coffee concentrate during one shopping trip and just had to try it. It is cold brewed with 100% Arabica beans and meant to be diluted with milk or water. It can be served hot or cold and is good for 30 days once you open the bottle. Its a great product for a quick coffee in the morning before the gym or an afternoon pick-me-up if you can't, or don't want to leave the house.

I've been making it over ice with milk in a pint sized glass, I use 1/3 cup of the coffee, 1/3 cup of water and 1/4-1/3 cup of milk. The result is in between an iced coffee and an iced latte, try it!
 Let us know if you have tried this yet and your thoughts!


Steak and Potato Salad
Our favorite guest blogger Kate is back! Today she is sharing with us her steak and potato salad!


This is a great salad for a weeknight dinner. It has a few different steps but comes together pretty easily and is hearty enough to fill you up. Adapted from this recipe, with potatoes, green beans and the addition of some steak tips its like a whole meal in salad form!

For the Walnut Dressing...
- 2 TB Vinegar
- 2 TB Plain Non-Fat Yogurt
- 1 Tsp Dijon Mustard
- 1/2 Tsp Salt
- 1/3 C Walnuts
- 2 TB Walnut Oil
The original recipe called for white wine vinegar, I didn't happen to have any and used regular white vinegar. I also used plain Greek yogurt. I found walnut oil with the olive oil in my regular grocery store, if you can't find it you can probably substitute olive oil you may just lose a little walnut flavor.
Preheat the oven to 400 and toast the walnuts for about 6 minutes, until they are fragrant. Meanwhile in a small mason jar combine the vinegar, yogurt, mustard and salt, and give it a quick stir. Roughly chop the walnuts and add to the jar with the walnut oil. Place the cover on the jar and give it a good shake. Set the dressing aside or place in the fridge.
For the Salad...
- 3-4 Red Bliss Potatoes
- 1 C Green Beans
- 3-4 oz Arugula
- 1/2 lb Steak Tips
Serves 2
Preheat the oven to 400 (or leave it on if you have just made the dressing). Dice the potatoes into bite sized pieces, toss lightly with olive oil, salt, and pepper. Roast on a baking sheet for 45-60 min until cooked through and lightly browned. The timing may depend on how large of a dice the potato is and how brown you like them.

While the potatoes are roasting bring a pot of water to a boil and prepare an ice bath. Trim the green beans then cut them in half or in thirds, so they are also bite sized.

Once the water is boiling, drop in the green beans and cook for about one minute. Then drain and transfer the beans to the ice bath to stop the cooking. Once the beans are cooled drain on paper towels.

Once the potatoes are done roasting let them cool slightly and prepare your steak tips to your liking. I used an Italian seasoning and grilled them. When the steak tips are cooked, let them rest while you assemble the salad. Toss the arugula, potatoes and green beans with the walnut dressing, divide between plates and top with the steak tips. Enjoy!

How delicious does this look? I can't wait to make this. Let us know if you try this recipe and how you adapted the recipe.
Happy Pinning!
Hawaiian Pork Chops and Tropical Rice
Hilton Head was awesome! I was even able to accomplish 3 out of 5 of my to dos! The only things we didn't get to do were go to Savannah and the Skullcreek restaurant. However, we did eat at The Old Oyster Factory, The Smokehouse, and a Italian Steakhouse which I can't remember the name of! Definitley recommend Hilton Head if you haven't been there yet!
Lately I have been eating so much chicken and beef. I tend to get in these little routines and forget about all the other options out there. The other day I was at the grocery store deciding on what we were going to have for dinner and I saw boneless pork chops. BINGO! So of course that sent me right to Pinterest to come up with some ideas for dinner.
I found a recipe via Pinterest that originated cristinecooks.blogspot.com for a pineapple honey marinade. The only ingredient I had to buy was some fresh pineapple. Below is my version of the recipe.
Ingredients:
- 4 boneless pork chops
- Fresh pineapple (I bought the sliced version at the store to use the fresh pineapple juice for the marinade)
- 1/3 cup honey or agave
- 1 tablespoon dijon mustard
- 1/2 tsp salt
- Pepper (I used enough to lightly dust the pork chops)
Directions:
- Prepare marinade. Whisk pineapple juice, honey, dijon mustard and salt in a small bowl.
- In a freezer bag, put pork chops in bag and pepper the pork chops. Pour marinade into bag and make sure that all pork chops are well coated.
- Refrigerate 45 minutes to an hour.
- Start prepping Tropical Rice (see below)
- Heat grill, and grill chops for 4-6 minutes on each side.
- Add pineapple splices to grill in the last 5 minutes and make sure they cook on each side.
 Of course we needed a side dish for our pork chops and I was trying to find something a little different that incorporated some type of fruit. I found a recipe via Pinterest from Hannaford.com for Tropical Rice. I decided that this was a great compliment to the pork chops. Not to mention with Uncle Ben's 90 second rice this side dish takes minutes to prepare!
Ingredients:
- 2 bags of Uncle Ben's Brown Rice (cooked)
- 1 large mango diced
- 1 medium red pepper diced
- 1/2 vidalia onion diced
- 1/2 cup dried coconut shavings
- Juice of 1 lime
- 1 tablespoon of rice vinegar
- Salt and pepper
Directions:

- In a bowl, mix all ingredients and serve! Could that be any easier?
I also served a Asian slaw salad and Hawaiian rolls along with the dinner!
 This is such a simple meal to serve! Great for guests! Next time I make this I am definitely going to have a tropical theme and serve the rice in hollowed out pineapples! And maybe some Mai Tai's! Here are some inspirational ideas for my next dinner party using this menu!
- 4 boneless pork chops
- Fresh pineapple (I bought the sliced version at the store to use the fresh pineapple juice for the marinade)
- 1/3 cup honey or agave
- 1 tablespoon dijon mustard
- 1/2 tsp salt
- Pepper (I used enough to lightly dust the pork chops)
Directions:
- Prepare marinade. Whisk pineapple juice, honey, dijon mustard and salt in a small bowl.
- In a freezer bag, put pork chops in bag and pepper the pork chops. Pour marinade into bag and make sure that all pork chops are well coated.
- Refrigerate 45 minutes to an hour.
- Start prepping Tropical Rice (see below)
- Heat grill, and grill chops for 4-6 minutes on each side.
- Add pineapple splices to grill in the last 5 minutes and make sure they cook on each side.
Of course we needed a side dish for our pork chops and I was trying to find something a little different that incorporated some type of fruit. I found a recipe via Pinterest from Hannaford.com for Tropical Rice. I decided that this was a great compliment to the pork chops. Not to mention with Uncle Ben's 90 second rice this side dish takes minutes to prepare!
- 2 bags of Uncle Ben's Brown Rice (cooked)
- 1 large mango diced
- 1 medium red pepper diced
- 1/2 vidalia onion diced
- 1/2 cup dried coconut shavings
- Juice of 1 lime
- 1 tablespoon of rice vinegar
- Salt and pepper
Directions:
- In a bowl, mix all ingredients and serve! Could that be any easier?
I also served a Asian slaw salad and Hawaiian rolls along with the dinner!
This is such a simple meal to serve! Great for guests! Next time I make this I am definitely going to have a tropical theme and serve the rice in hollowed out pineapples! And maybe some Mai Tai's! Here are some inspirational ideas for my next dinner party using this menu!
 |
| Pineapple Serving Bowl |
 | ||
Pineapple Flower Vase
|

Happy Pinning!
Passion Iced Tea Sparkler
Happy Thirsty Thursday!

Nothing is better than Passion Iced Tea from Starbucks in the summer. However, now living in the suburbs I can no longer walk out my front door and grab an iced tea from Starbucks across the street. The other day I was at the grocery store and saw that TAZO came out with passion iced tea bags. What is great about these bags is that you only need one bag to make 4 quarts of iced tea.
Of course I couldn't just have plain iced tea, I had to spice it up a little to make it perfect for sitting on the back porch.
Ingredients:

- 1 Tazo Passion Iced Tea Bag
- 1/4 cup agave or honey
- Ice
- 2 cups sparkling water or seltzer
- 1/4 cup mint leaves
- Strawberries
Directions:
- Boil water for iced tea and add agave or honey; once boiled add tea bag and steep for 30 minutes to 1 hour (depending on how strong you want your tea!).
- Remove tea bag
- Fill glasses with ice and mint leaves
- Pour iced tea over ice filling half way
- Top iced tea with sparkling water and stir
- Garnish with strawberry
 And most importantly enjoy!!
Happy Pinning!
And most importantly enjoy!!
Happy Pinning!
- Boil water for iced tea and add agave or honey; once boiled add tea bag and steep for 30 minutes to 1 hour (depending on how strong you want your tea!).
- Remove tea bag
- Fill glasses with ice and mint leaves
- Pour iced tea over ice filling half way
- Top iced tea with sparkling water and stir
- Garnish with strawberry
And most importantly enjoy!!
Happy Pinning!
Coconut Lime Cilantro Cooler

Adapted from Momontimeout.com
Ingredients:
- 1/3 cup Coconut Water - I used Vita Coco Pure Coconut Water
- 1/3 cup Club Soda (recipe calls for ginger ale or sparkling water, however ginger ale would take over the coconut taste, and sparkling water doesn't have enough fizz)
- 1 tablespoon of fresh lime juice (recipe calls for 2 tablespoons, you can always add more but you want to make sure that the lime doesn't overpower the coconut water)
- 1 tsp chopped Cilantro
Directions:
- Stir all ingredients together
- Pour into glass filled with ice
- Garnish with a slice of lime and cilantro
ENJOY!!! Also, you may have seen my metal straws in pictures. I am obsessed with them. They keep your drink cold. You can find them at William Sonoma or Crate and Barrel! I have both kinds and love them equally. The Crate and Barrel straws are great for smoothies or frozen drinks.


Happy Pinning!!
Strawberry Avocado Couscous Salad with Lime Vinaigrette
Sorry for such a late post! Coming back from vacation is rough! Haha! I spent 3/4 of the day running errands and unpacking.
Tonight for dinner I made strawberry avocado couscous salad with a lime vinaigrette which I saw on Pinterest. I served this with grilled chicken that had a William Sonoma Meyer Lemon Peppercorn Rub.
This is definitely a quick and easy recipe to make, not to mention perfect for summer bbq's.
Recipe adapted from http://damndelicious.net.
Salad Ingredients:
- 1 cup couscous
- 1 avocado diced
- 1/2 cup corn kernels (I used the bird's eye frozen, but would use fresh corn next time!)
- 1 cup of strawberries cut into quarters (recipe calls for 1/2 cup but I doubled the recipe)
- 2 tablespoons of fresh cilantro chopped
- 1/4 cup sliced almonds (recipe called for 2tbs pine nuts but I couldn't find them at the store)
Lime Vinaigrette Ingredients:
- 1/4 olive oil
- 1/4 apple cider vinegar
- zest of 1 lime (I would use half, taste dressing and add more if desired)
- 2 tablespoons of freshly squeezed lime juice
- 2 teaspoons sugar
Directions:
- Prepare couscous according to directions and let cool
- Make vinaigrette, and whisk together
- In a large bowl, carefully combine couscous, avocado, corn, strawberries, cilantro, and almonds. Stir in lime vinaigrette.
- Chill for 10-15 minutes in fridge (recipe says serve immediately but I preferred the salad cold)
Enjoy and Happy Pinning!!
Five on Friday - Memorial Day Weekend
Memorial Day Appetizers
Of course we need to make sure we are well fed at the beach. I love this recipe for blueberry, strawberry and jicama salsa. Not only is it on theme but doesn't it look refreshing after a long day at the beach or golfing? I will definitely let you know how it tastes and if you should make it.
 Hibiscus Iced Tea Sparkler
We need to make sure we stay hydrated over the weekend. I can't wait to try this hibiscus iced tea sparkler. I am a huge fan of hibiscus iced tea, it is a great alternative for when you want something slightly sweet and don't want all the sugar of the juice. Looking at the recipe at first glance I might swap the honey for agave and cut the amount in half. I am personally not a fan of overly sweet beverages.
Hibiscus Iced Tea Sparkler
We need to make sure we stay hydrated over the weekend. I can't wait to try this hibiscus iced tea sparkler. I am a huge fan of hibiscus iced tea, it is a great alternative for when you want something slightly sweet and don't want all the sugar of the juice. Looking at the recipe at first glance I might swap the honey for agave and cut the amount in half. I am personally not a fan of overly sweet beverages.

Jalapeño Moscow Mule
I know it is early but time to think about Happy Hour!! I had a few jalapeños lying around that I had to use. We didn't have a lot of options to mix in with food so I decided to search for a refreshing drink that incorporated jalapeños, limes and ginger beer! I couldn't find exactly what I wanted so I used a combination of a few pins and make up my own drink.
My inspiration for the Jalapeño Moscow Mule came from HappyYolks.com. I didn't have any vodka or the guava juice. So instead I substituted with limes and soda water.
Ingredients:


My inspiration for the Jalapeño Moscow Mule came from HappyYolks.com. I didn't have any vodka or the guava juice. So instead I substituted with limes and soda water.
Ingredients:
- 6 Oz Ginger Beer
- 4 Oz Soda Water or Vodka
- 1 Lime
- 1/4 of a Jalapeño
- 1/4 tsp Agave
- Crushed Ice
Directions:
- Muddle limes and jalapeños in a shaker
- Add Ginger beer, soda water, and agave
- Pour over crushed ice
- Garnish with lime and jalapeño
Remember the longer you let the jalapeño in your drink the spicier it is! PS I know I should be serving these in copper mugs, but my mugs are in storage until we move into our new home!!
Happy Pinning!
My Pinterest To Do List - June
Food & Drink:
This past week we went to the most amazing breakfast spot in Atlanta called The Flying Biscuit Cafe. It was SOOOO good! My husband had their sausage and biscuits and I had oven baked green tomatoes, grits, and a spicy salsa on top. Of course everything was served with homemade biscuits and homemade cranberry apple butter. My goal for June is to recreate both of our breakfasts!! I will make sure to post the recipes and pictures when I make them.


This past week we went to the most amazing breakfast spot in Atlanta called The Flying Biscuit Cafe. It was SOOOO good! My husband had their sausage and biscuits and I had oven baked green tomatoes, grits, and a spicy salsa on top. Of course everything was served with homemade biscuits and homemade cranberry apple butter. My goal for June is to recreate both of our breakfasts!! I will make sure to post the recipes and pictures when I make them.
Quinoa Lasagna
My favorite guest blogger, Miss Kate is sharing another recipe with us. Kate a few weeks ago shared a recipe for a Spinach Torta in a Potato Crust! We are so excited
This is a yummy dish packed with veggies, red sauce and a little cheese for good measure.
I had some bolognese sauce in my freezer that I made this winter and wanted to use it up, and I've been obsessed with quinoa recently, I was late to the party with that one, but now I use it in everything. I figured I could make a sort of lazy lasagna, casserole type dish with the bolognese and some fresh veggies and the quinoa. If you don't have any leftover sauce hanging around you can certainly use a jarred version.
I made the whole dish in my cast iron skillet, one of my favorite things in my kitchen. You can saute the veggies, make the sauce, assemble the dish and put it right in the oven, easy!
Ingredients:
- 1 C Quinoa
- 3-4 C Tomato Sauce
- 1 Small Zucchini, diced
- 1 Small Yellow Squash, diced
- 8oz Mushrooms, quartered
- 1 Bell Pepper, diced
- 1-2 C Shredded Mozzarella or Italian Blend cheese
Makes about 6 servings.
While chopping your veggies cook the quinoa according to the package instructions, and set aside.

Preheat your oven to 350.
Heat drizzle of olive oil over medium heat in a skillet, toss in all your chopped veggies and season with salt & pepper. Saute until just cooked, you don't want them to turn to mush when you assemble the dish, and they'll cook a little more when everything goes in the oven.

Wipe out the skillet and return it to the stove. Over medium heat, warm or make your tomato sauce. I combined my leftover bolognese with an 8oz can of tomato sauce and a 14.5oz can of diced tomatoes in sauce. Let it simmer for a few minutes, and make sure to check for seasoning, add oregeno or basil, salt & pepper as needed.

Once the sauce is warmed through turn off the burner, or remove the skillet from the heat. (If you aren't using a cast iron skillet you can assemble everything in a casserole dish) Toss in the cooked veggies with the sauce, then add in the quinoa. Add in some shredded cheese, I used about a handful of an Italian Blend and handful of mozzarella, use more or less if you desire, mix well so the cheese is distributed evenly. Then top with another sprinkle of cheese.
Bake for 15-20 minutes until everything is warmed through and starting to bubble, then turn on the broiler for 2-3 min to get the top nice and melty!

Thank you so much Kate for sharing!!


Strawberry Smash Mocktail

So it has been beautiful here in North Carolina. Since the weather has been so nice every night before dinner I sit outside on the patio to read, and decided that I need some fun beverages! And have become obsessed with Mocktails! And I can pick some of the ingredients from our mini-garden. One of my new favorite drinks is a Strawberry Mint Smash I saw on Pinterest.
Super simple to make! I doubled the recipe and adjusted it a little. This is the non-alcholoic version but I am sure you can add rum or vodka as well!
Ingredients:
- 4-6 Strawberries cut into slices
- 12-14 large mint leaves
- Crushed ice
- 4 teaspoons of agave nectar
- 1/4 cup lime juice
- 6 ounces of blood orange Italian soda - I used orange since I am not a fan of blood orange, you can also use lemon as well
- Club Soda

Directions:

- Put the strawberries, mint and muddle.
- Add agave nectar and lime juice into a shaker and muddle. I used a mason jar since I find them easy to clean, and I have a ton of them hanging around my home.
- Add Italian Soda and shake! Be careful since this will get really bubbly.
- Fill glass with 2/3 of crushed ice.
- Pour into glasses, and top with club soda. Garnish with Strawberry, lime, mint, etc!
Voila!


Let me know if you make this drink and how you modify it!
Happy Pinning!
Fiesta Salad
So along with nice weather means lots of ice cream! So instead of cutting out my ice cream consumption I decided that eating salads for dinner would allow me to eat more ice cream. The other night we bought a bunch of chicken and put it on the grill for salads for the week. Which makes life so much easier when you want to assemble dinner quickly.


We had some leftover corn from dinner the night before which inspired my fiesta salad! This is one of my favorite salads and basically I just grab whatever ingredients that I have around the house that sound good to me.
Sample ingredients can include: grilled chicken, grilled steak, shrimp, avocado, jalapeños, jicama, peppers, pepper jack cheese, mango, black beans, corn, cilantro, red onion, etc!
Now you can always make a creamy BBQ Ranch dressing, but since I am trying to cut down on calories (to eat more ice cream) I adapted a recipe from SkinnyTaste that I found on Pinterest.
The recipe is for a bean salad, but since we were making this a meal I made it into a salad.
Dressing Ingredients:
- 2 cloves garlic, minced
- 3 tbsp fresh lime juice
- 1/4 extra virgin olive oil
- 1 tsp cumin
- pinch crushed red pepper flakes
- 1/4 tsp salt
- fresh ground pepper to taste
Salad Ingredients:
- Lettuce
- Tomato
- Red onion
- Grilled chicken
- Corn
- Black Beans
- Cilantro
- Red Pepper
- Pickled jalapeños
- Shredded cheddar cheese (or pepper jack if you have it)
- Whatever else sounds good to you (avocado, mango, etc)!
Toss the salad with the dressing and you have a super simple dinner! You can also add fresh jalapeños if you like more hotness! I served this with black bean mango salsa and of course a fun cocktail!
Happy Pinning!
Nature Box Snacks - Review of Program
So every night after dinner my husband always asks me what do we have for snacks! Of course I could show him where I keep my secret stash of Double Stuff Oreos but those are for my sweet tooth emergencies! Recently on Facebook I keep seeing advertisements for Nature Box. I noticed a few friends of mine had liked it, so I decided to check it out for myself.Nature Box is a subscription program that delivers healthy snacks that contain no artificial sweeteners, flavors or colors. They have over 100 different snacks to choose from that include nuts, savory, and sweet snacks.


I definitely recommend joining! If you are interested in joining please use my link http://fbuy.me/RdzU and I believe you also get 50% off your first purchase!
PS I am still working on my planters! I did manage to finish all my planting this weekend with existing planters and the herb garden!
Fresh Mint, Beet, Grilled Chicken Salad with Meyer Lemon Dressing
Yesterday was a busy day! I had to drive my husband to the airport and then ran a few errands at the South Park Mall, and may have also done some shopping. By the time I got home I just wanted to make something simple for dinner.
I recently found a recipe for Fresh Mint and Beet salad with Lemon Dressing and decided that it would be perfect for dinner. I also had some grilled chicken and feta cheese that I thought would be a perfect addition.

For the grilled chicken I used a Meyer Lemon Peppercorn Rub I bought at William Sonoma last fall. Unfortunately they don't sell this rub anymore. I would maybe substitute with lemon pepper seasoning.
Also have you seen these prepackaged fresh beets? I know it is cheating not roasting them myself but they are so quick and easy when you want to be lazy!
You can find the recipe for the salad and dressing here. But here are the basics just in case...
To make the salad just add arugula, fresh beet, sliced cherry tomatoes, slivered almonds, and fresh mint. Once I started eating the salad I was thinking maybe a few kalamata olives might be tasty too! The dressing is simply Meyer lemon juice, olive oil, shallots, salt & pepper.
The entire meal took less than 30 minutes to make! And with the warm weather we are having in Charlotte it was the perfect summer dinner!
Happy Pinning!
I recently found a recipe for Fresh Mint and Beet salad with Lemon Dressing and decided that it would be perfect for dinner. I also had some grilled chicken and feta cheese that I thought would be a perfect addition.
For the grilled chicken I used a Meyer Lemon Peppercorn Rub I bought at William Sonoma last fall. Unfortunately they don't sell this rub anymore. I would maybe substitute with lemon pepper seasoning.
Also have you seen these prepackaged fresh beets? I know it is cheating not roasting them myself but they are so quick and easy when you want to be lazy!
You can find the recipe for the salad and dressing here. But here are the basics just in case...
To make the salad just add arugula, fresh beet, sliced cherry tomatoes, slivered almonds, and fresh mint. Once I started eating the salad I was thinking maybe a few kalamata olives might be tasty too! The dressing is simply Meyer lemon juice, olive oil, shallots, salt & pepper.
The entire meal took less than 30 minutes to make! And with the warm weather we are having in Charlotte it was the perfect summer dinner!
Happy Pinning!
Cinco de Mayo Recap!
So yesterday I posted the recipes I found on Pinterest for Cinco de Mayo! I just wanted to show some pictures and tips I learned from making the recipes. Unfortunately I didn't get to make the sombrero cookies! I bought the ingredients but got sidetracked earlier in the day and didn't put them together! I am sure I will dig into them later today!
To start I made the Cilantro Jalapeño Limeade which was so refreshing and great with tequila! Maybe next time I would try vodka. The recipe calls for 3/4 cup of sugar to make the simple syrup, because you also add agave nectar I might cut this back by half. I am not a fan of sweet drinks, and would rather be able to taste the jalapeño!
And I would fill the glasses with ice and not the pitcher like the recipe calls for. It was way too hard to pour and since it is 85 degrees outside the drinks got warm fast. I had to go back inside and get an ice bucket to cool the drinks!
 |
| Cilantro Jalapeño Limeade |
Here are a few snapshots of our dinner! I tried to be festive and brought out some of the bowls that were purchased in Cabo San Lucas! I used margarita glasses to serve salsa and sour cream!


The turkey enchilada lasagna was so quick and easy to make. I might rename this recipe lazy man's enchiladas! I might add some diced jalapeños next time to give the dish a lil more kick. However, I love spicy food so the recipe is perfect as is if you are not a fan of spicy. Also, when I was putting together the lasagna I was afraid that their wasn't enough meat at all. But after baking it all came together really well. I also used an entire packet of cheese in the dish (i love cheese!!). It was delicious and served 4 people with 2 slices left for leftovers.
 |
| Turkey Enchilada Lasagna |
Next up were the jalapeño cheddar popovers! All you need is a blender and you are all set. Basically you just blend all the ingredients and let it sit for 30 minutes. I used a popover pan, but the recipe calls for a muffin tin. I am sure that would work well too! And side note I totally forgot to add the butter (left it in the microwave) and they came out perfect. You can also add more cheese and jalapeños if you want them cheesier or spicier!
 |
| Jalapeño Cheddar Popovers |
Really what is a Mexican meal without guacamole? I quickly made up some guacamole with the leftover ingredients I had from making the meal above! I also made a fiesta salad and served with Mexican rice (totally cheated and bought the kind you heat up in the microwave for 90 seconds)!!


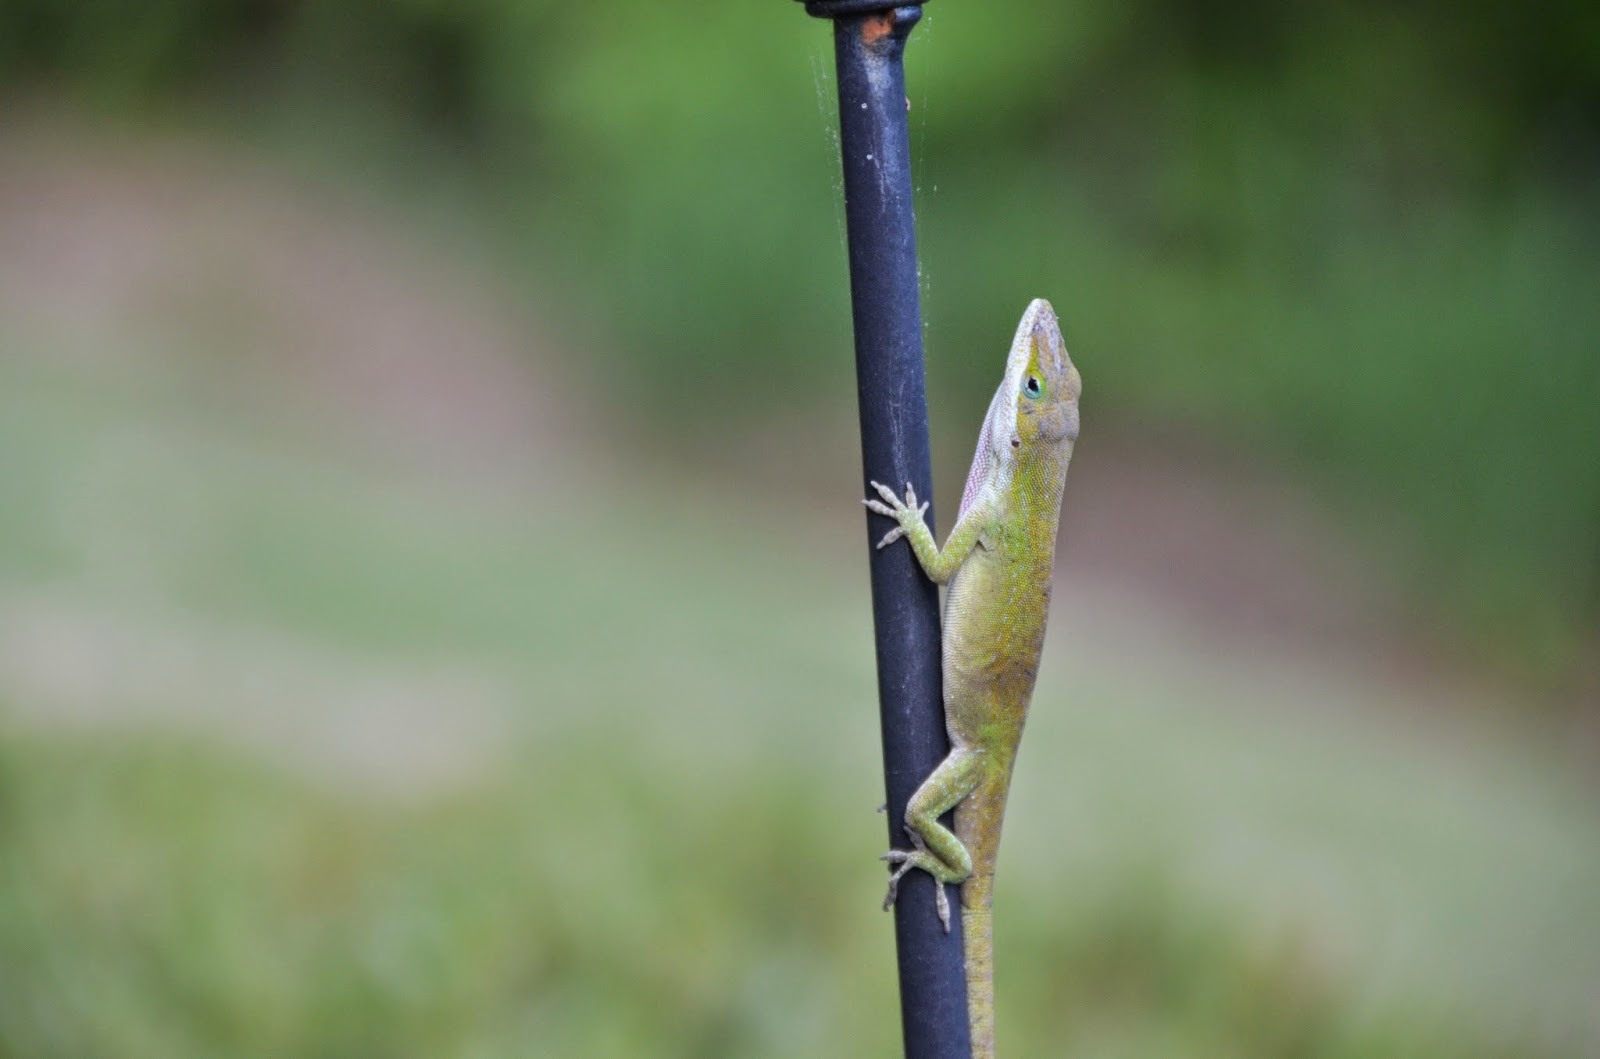
During dinner we also had a guest! This lil lizard was hanging out on a lantern!
And last but not least, we had to dress up our cat. Can you tell he is excited it is Cinco de Mayo?

Happy Pinning!
Happy Cinco de Mayo Recipe Pinspiration
Happy Cinco de Mayo!!! How is it May already?
Here are a few of the things I am thinking about making. I will let you know how everything turns out tomorrow.
Cilantro Jalapeño Limeade
This sounds delicious! I am going to try and recreate one of my favorite drinks from The Gallows in Boston called the Brazen Bull. The Gallows makes this drink with vodka, however since it is Cinco de Mayo thinking we might have to add tequila! Decisions decisions!!

Turkey Enchilada Lasagna
Okay okay, I know this isn't really fun. But it looks like it has slightly less fat then traditional enchiladas. We have to save our calories for the guacamole and chips!

Jalapeño Cheddar Popovers
Since we saved some calories using ground turkey, fat free cream cheese, and using whole wheat tortillas with our enchilada lasagna, we need to make sure we make up for it somewhere else. These popovers look so simple to make!

Sombrero Cookies
I am sure I can make something more authentic, however I am planning on spending most of my day sitting outside on the dock tomorrow reading a book. It is supposed to be 87 degrees here in North Carolina (sorry New Englanders) so I am taking a short cut with the dessert. Not to mention who is going to have room after eating dinner! Thinking of buying store bought sugar cookies, frosting in a can, sprinkles and gum drops!!

I will also make sure to put out some nacho chips, guacamole and salsa for everyone to snack on as well.
For additional ideas on what to make for Cinco de Mayo make sure to check out my Pinterest board.
What are you planning to make? Anyone have a favorite guacamole recipe they would like to share? Every time I make guacamole it comes out a little different. I like to experiment with what I have lying around in the fridge.
Happy Pinning!
Here are a few of the things I am thinking about making. I will let you know how everything turns out tomorrow.
Cilantro Jalapeño Limeade
This sounds delicious! I am going to try and recreate one of my favorite drinks from The Gallows in Boston called the Brazen Bull. The Gallows makes this drink with vodka, however since it is Cinco de Mayo thinking we might have to add tequila! Decisions decisions!!
Turkey Enchilada Lasagna
Okay okay, I know this isn't really fun. But it looks like it has slightly less fat then traditional enchiladas. We have to save our calories for the guacamole and chips!
Jalapeño Cheddar Popovers
Since we saved some calories using ground turkey, fat free cream cheese, and using whole wheat tortillas with our enchilada lasagna, we need to make sure we make up for it somewhere else. These popovers look so simple to make!
Sombrero Cookies
I am sure I can make something more authentic, however I am planning on spending most of my day sitting outside on the dock tomorrow reading a book. It is supposed to be 87 degrees here in North Carolina (sorry New Englanders) so I am taking a short cut with the dessert. Not to mention who is going to have room after eating dinner! Thinking of buying store bought sugar cookies, frosting in a can, sprinkles and gum drops!!
I will also make sure to put out some nacho chips, guacamole and salsa for everyone to snack on as well.
For additional ideas on what to make for Cinco de Mayo make sure to check out my Pinterest board.
What are you planning to make? Anyone have a favorite guacamole recipe they would like to share? Every time I make guacamole it comes out a little different. I like to experiment with what I have lying around in the fridge.
Happy Pinning!
Strawberry-Rhubarb Shortcake with Whipped-Cream Biscuits
For the past week in North Carolina we have had the most beautiful weather. Coming from Boston I savor every single day of sunshine and the first warm day makes me think that summer is here. I was in the grocery store and saw fresh rhubarb which instantly made me think of a summer recipe to make.
I remember seeing a recipe for strawberry-rhubarb shortcake with whipped cream biscuits on Pinterest that sounded like the perfect dessert to have with dinner while we were eating outside!
 |
| http://www.pinterest.com/pin/167196204890015662/ |
This recipe is SO simple to make and is so incredibly delicious. I have been making shortcake for years and have always been complimented on my biscuits. I can tell you I am no longer making biscuits with my old recipe moving forward. This recipe calls for homemade whipped cream to make the biscuits. It makes the biscuits so incredibly creamy!! I also like the fact that you can make this recipe ahead of time or in stages depending on how much time you have.
The only tweak I would make to this recipe moving forward is to double the strawberry-rhubarb filling. Personally, I like my shortcake where the strawberry yumminess seeps into the biscuits!!
This recipe was originally from Yankee Magazine - May 2012
Ingredients:

Strawberry-Rhubarb Filling: Double this if you like lots of filling!
- 1lb medium-size strawberries, hulled and quartered
- 3/4 cup granulated sugar, divided
- 2 tablespoons freshly squeezed orange juice
- 1-1/2 cups chopped fresh rhubarb (about 2 stalks)
- Pinch table salt
Mix berries with 1/4 cup sugar and 2 tablespoons of orange juice in a medium-size bow. Toss gently and set aside.

In a small saucepan, combine rhubarb, remaining 1/2 cup sugar and salt. Set over medium heat to cook, stirring, until sugar melts and liquids are simmering nicely, 8-10 minutes. Remove from heat and cool to room temperature. Rhubarb will soften as it sits.
Add berries and stir. Set aside.
Whipped Cream Biscuits
Ingredients:
- Unsalted butter (to grease baking sheet0
- 2 cups sifted all-purpose flour, plus extra for work surface
- 1 tablespoon baking powder
- 1/2 teaspoon salt
- 2 tablespoons granulated sugar
- Freshly grated zest of 1 orange
- 1 cup heavy cream, plus extra for biscuits
- Course or granulated sugar

Preheat over to 400 degrees. Grease a baking sheet, and set aside.
 In a large bowl, whisk together flour, baking powder, salt, sugar and orange zest.
In the bowl of a standing mixer (I used my hand mixer), whip cream until it forms firm peaks.

Using a 2-1/12 inch-wide biscuit cutter, cut biscuits and lay them on a baking sheet. Brush with extra cream and sprinkle with course or granulated sugar (I used Sugar in the Raw!).

Bake until golden, 15-17 minutes. Cool on racks.
Whipped Cream
Ingredients:
- 1 cup heavy cream
- 2 teaspoons granulated sugar
- 1 teaspoon vanilla extract
Just before serving, make the whipped cream: Beat cream, sugar and vanilla until firm peaks form.
To plate, split each biscuit horizontally. Spoon berry and rhubarb mixture on bottom half, cover with top half. Garnish with whipped cream. ENJOY!!


For other summer recipes make sure to check out my Pinterest page.
Happy Pinning!
Pesto Baked Ziti
My mother-in-law is still recovering from her hand surgery so I wanted to make something for dinner that was easy to eat (no knives required) and also something that would provide them with leftovers. I remember seeing a recipe for Pesto Baked Ziti and decided that I would try it out.This was SUPER simple to make! Boiling water and making sure the sausage was cooked through was the hardest task!
The only tweaks I would make would be ...
- Use penne instead of ziti. I think the cheese and sauce would cling to the penne better.
- In the directions they tell you to layer the pasta, meat, and cheese. I think stirring it in together would make me it slightly easier to serve and make sure you get even distribution of ingredients!
This recipe is from The Neelys and you can find it on my Pinterest Page.

EPISODE: That’s Amore
Ingredients:

- Salt
- 1lb ziti - (I personally am a huge fan of DeCecco pasta!)
- 1lb hot Italian turkey sausage, casing removed - I used regular Italian sausage
- 1 medium onion, chopped - to make things simpler I bought chopped onions at the grocery store (they were on sale!!)
- 3 cloves garlic, chopped
- 1 (28-ounce) can diced tomatoes - debating on if next time I would add a 1.5 cans
- 6 ounces of pesto (I really should have made this homemade but I was being lazy!)
- 1 (9-ounce) package of washed spinach
- Butter, for baking dish
- 2 cups shredded mozzarella, plus more for topping
- 1 1/2 cups grated Parmesan, plus more for topping
Directions:
- Preheat Oven to 375 degrees
- Make pasta (remember to salt your water!!) and drain in colander
- In a large skillet over medium heat, sauté sausage. Add onion and garlic and sauté until sausage is cooked through. Make sure to break up the sausage so it resembles ground beef. Add the can of tomatoes and pesto. Let it simmer for 10 minutes.

- While the sauce is simmering, in a separate bowl mix the spinach, ricotta, mozzarella and parmesan in a separate bowl.

- Butter a 4-quart baking dish, add the pasta, then sausage mixture and cheese mixture. Top with a sprinkle of mozzarella and Parmesan.

- Bake completely through and golden and crisp on top, about 20 minutes.

Would love to hear if you liked this recipe and any ideas on how to make it better!
Sur La Table - Homemade Cheese Workshop - Making Ricotta Cheese
Do you see those Pinterest posts about making your own ricotta, mozzarella cheese, etc? Or how dreamy do all those pictures of burratta look? I am obsessed with cheese by the way.
 |
| http://www.pinterest.com/pin/167196204888670640/ |
 |
| http://www.pinterest.com/pin/167196204888657865/ |
Since I was moving out of Boston's North End to North Carolina I was determined to learn how to make my own mozzarella/burrata and pasta (pasta post to come!!), since I wouldn't be able to run across the street to one of the amazing shops. My favorite shop was Monica's. This place was amazing. My husband wants to open one in Charlotte one day. The people working there are so incredibly nice and they have the best homemade cheeses, pastas, italian meats, etc. They also have 2 restaurants in the North End. My favorite is Monica's Trattoria which is diagonally across the street. It is really small and cozy but the food is delicious. It is a neighborhood gem. Definitely try out there risottos of the day, or if they have the squid ink pasta!!
 |
| http://www.monicasboston.com/# |

Anyway, the point of this blog post is to talk about how easy it is to make homemade ricotta! The mozzarella and burrata aren't hard but definitely take more time and you need to get the stretching technique down before you get store quality mozzarella.
During the Homemade Cheese Workshop class at Sur La Table they gave us the following overview of the process, basics, tips and how to make ricotta which I wanted to share! These classes are awesome. They are about 3 hours long but that also includes sampling of what you are making. In this case we not only had our yummy ricotta, mozzarella and burrata, but we also had pasta to go with it!!
These directions were adapted from the Sur La Table Homemade Cheese Workshop pamphlet, and they used Ricki Carroll Home Cheese Making book as a reference.
Don't be scared by the process or technique tips. I just included them because I thought they were interesting and I can be a slight food nerd!
Cheese making Process:
- Cheese making is basically the process of removing water from dairy milk
- First characteristic of cheese is based on how much water is removed (ex. Soft cheeses contain more water, while parmesan hardly contains any water)
- Milk is mostly water, and what remains is fat, protein, lactose and minerals.
- You can use lemon juice or vinegar which is the simplest method to create an acid, or you can use a bacteria to create an acid in the milk. The preferred method is bacteria since it provides flavor and character. Both ways to use the acid cause the milk to coagulate into curds.
- Basic ingredients for making cheese are milk, start culture/or natural acts, and an enzyme like rennet to aid in separating portends from water.
- Sur La Table, William Sonoma and other stores actually sell cheese making kits where all you have to buy is milk. But you can also buy the ingredients on Amazon if you have a good and reliable instant-read thermometer.
Cheese making Tips/Basics:
- Sterilize all tools and make sure that everything is clean including your counter tops and cheesecloth.
- Make sure to use the best quality dairy products.
- Pasteurized milk or cream works well but don't use ultra-pasteurized. You can usually find pasteurized milk at Whole Foods. Best way to tell if your milk is ultra-pasteurized is by the "sell by" date, if the date is 3 or more weeks from purchase date then it is most likely ultra-pasteurized.
- Pay special attention to time and temperature! A few degrees off and it can totally make a difference. I learned this when we were making our mozzarella.
- Definitely invest in a reliable instant-read thermometer. You need to know the exact temperature!
- Use a large, heavy bottomed, high quality pot for heating milk. This will help to prevent scorching and ensure even heating.
Homemade Ricotta:
In Italian, "ricotta" means "re-cooked", which refers to the process from which it was made. The whey drained from making mozzarella was reheated and strained again to make ricotta cheese. For a richer, creamier cheese, replace party of the milk with 1/2 to 1 cup cream or half-and-half.
Recipe Yield: 10 to 12 ounces
Ingredients:
- 8 cups whole milk (no ultra pasteurized)
- 1/2 to 1 teaspoon cheese salt (could also use very fine sea salt)
- 2 cups buttermilk, preferably whole milk (remember the flavor comes from the richer ingredients!)
Place the milk in a large, heavy saucepan and set over medium-high heat. Cook, stirring almost constantly, until the milk comes to a frothing boil. Turn off the head and, as the bubbling subsides, stir in the salt and buttermilk. Continue gently stirring in one direction until the curds and whey separate. The mixture will slightly resemble thickened buttermilk. The why will still look milky and the curds will be very small. Remove from the stove and let sit, completely undisturbed for about 5 minutes.
Carefully pour the curds and whey through a cheesecloth. Leave the curds in the strainer for about 15 to 30 minutes depending on how dry you would like your ricotta.
Use immediately or store in the refrigerator for up to 5 days in a sealed container.
 |
| http://www.pinterest.com/pin/223561568971924541/ |
Isn't that super simple? I think this is perfect if you are making any salads with fresh ricotta, or any dishes that feature ricotta. If you are making baked ziti I would still stick to the store bought. This is fun if you can make the ricotta the star of your meal!
Don't be afraid of the make your own recipes on Pinterest. Definitely test these out and who knows they may be better then what you buy at the store.
Happy Pinning!
Chicken with Brussels Sprouts
This morning I was making breakfast and noticed that I had some brussels sprouts that I bought and forgot to use. I also had some chicken in the freezer and decided to look on Pinterest for some recipe ideas. I found this great recipe that myrecipes.com posted for chicken with brussels sprouts!
 |
| http://www.pinterest.com/pin/167196204890509198/ |
Ingredients
- 2 tablespoons olive oil, divided
- 4 (6-ounce) skinless, boneless chicken breast halves
- 3/8 teaspoon salt, divided
- 1/4 teaspoon freshly ground black pepper
- 3/4 cup fat-free, lower-sodium chicken broth, divided
- 1/4 cup unfiltered apple cider (I used apple juice since I didn't have apple cider)
- 2 tablespoons whole-grain Dijon mustard
- 2 tablespoons butter, divided
- 1 tablespoon chopped fresh flat-leaf parsley (I didn't have this on hand so I omitted)
- 12 ounces Brussels sprouts, trimmed and halved
- 2 Apples cubed (not in the original recipe but I added)
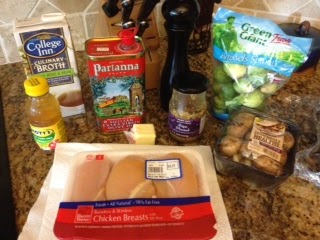
First pre-heat your oven to 450 degrees. I used my Le Creuset pan to sear the chicken for 3 minutes in olive oil. I also salted/peppered the chicken the on each side before putting it in the oven to cook for 10-12 minutes. Be VERY VERY VERY careful when removing this pan. I had a normal potholder on my hand and it was too hot for me to hold. I had to use a glove potholder and then a regular pot holder.

In a separate pan, eat remaining 1 tablespoon oil and 1 tablespoon butter in a large nonstick skillet over medium-high heat. Add Brussels sprouts and apples; sauté 2 minutes or until lightly browned. Add remaining 1/8 teaspoon salt and 1/4 cup broth to pan; cover and cook 4 minutes or until crisp-tender.


I also served rice pilaf with the meal! It was delish!!

I could also see making this recipe with pork chops or pork loin as well! Definitely check this recipe out and let me know how you make this as well!
Happy Pinning!
Most Amazing Bloody Mary Ever
So I was just on Pinterest and had to share this picture. I may have to plan a trip to
Sobelman's Pub & Grill in Milwaukee just for this drink.
And I thought Stephanie's on Newbury in Boston had a crazy bloody mary! This is a drink and a feast in one!!
 |
| http://www.pinterest.com/pin/509188301592657708/ |
Do you know of any other places that have crazy bloody mary's that are a must have?
My Husband's Instruction Manual


My mother-in-law had hand surgery today so I wanted to do something special for her and decided to go to my husband's instruction manual to find a home cooked meal for her. Not to mention something that she didn't have to use a knife for. This is a recipe that her mother used to make for her. The key ingredient according to my father-in-law is the 80% lean meat!! As he says you want a layer of grease at the bottom of the pan while cooking. Good thing I knew this! Otherwise I may have tried to pass ground turkey instead of ground beef.
The ingredients are simple and most of which you should have around the house.
- 2lbs Ground Beef (80% lean)
- 1 sleeve of saltine crackers crushed (I crushed in a plastic bag)
- 1/2 Chopped Green Pepper
- 1/2 Chopped Red Pepper
- 1 Chopped Medium Onion
- 2 Eggs
- 3/4 Cup of Milk
- Salt and Pepper
- Ketchup

(I cheated here and bought a pre-chopped fajita mixture for the peppers and onions!!)
Don't forget to take off your rings before you start making this recipe! You don't want ground meat stuck in between your jewels!!
In large bowl, mix ground beef, onion, green and red pepper, eggs and milk. In a plastic bag, crush crackers until fairly fine and uniform in size. Add crackers to the meat mixture, along with salt and pepper. The key here is to NOT over mix the meat. You want to make sure it is combined but you don't want to handle the meat too much.

Grease a baking dish, put meat mixture in baking dish and form into a log shape. Pour ketchup on top. Add about a 1/2 inch of water to baking dish, so the meatloaf is like an island.
Bake at 350 degrees for about 45-60 minutes. Make sure to cut into the middle and check for doneness. You don't want any pink in the inside!
And Voila! You have Paul's instruction manual meatloaf! I served with some homemade mashed potatoes and corn.

Since my mother-in-law can't use her hand I also prepared for her some chicken salad for lunch! This is also from my husband's instruction manual. I chopped 2 cooked chicken breasts, added some mayo, pecans, celery, Craisins, and pepper. Super simple to make and now she has lunch for the next few days!! I forgot to mention I also brought her some bread as well to make sandwiches.


Last but not least I also made her Lemon Poppy and Coconut Choclate scones to eat for breakfast. I included some lemon curd as well to eat along with the scones. However, I forgot to take pictures!!
I know these recipes didn't come from Pinterest but I thought I would share some family recipes!
Tomorrow I am going to make my in-laws baked ziti with pesto! Super excited to try out this new recipe and I will make sure to report back!
Happy Pinning!!
No comments:
Post a Comment